Want a secure way to spin up your knowledge base without the SaaS bill? In this guide, we’ll install Outline Wiki on Docker step by step, harden it for production, and wire up Google OAuth, AWS S3, and Nginx Proxy Manager.
Outline Overview
Outline is an open-source, team-friendly knowledge base and wiki that combines the look and feel of Slack with Notion’s functionality. It ships with collaborative editing, rich media embeds, private spaces, and snappy search capabilities out of the box.
Key Features
- Real-time collaborative editor
- Slack-style slash commands
- Granular permissions & collections
- SSO/OAuth (Google, Microsoft, etc.)
- External storage (AWS S3, or local)
Outline as a Notion Alternative
Need version history, self-hosting, and zero vendor lock? Outline ticks those boxes while keeping a modern UI and markdown-first writing flow. You own the data and decide the SLA.
Considerations
- Security: run behind TLS, keep .env secrets outside Git, and enable automatic OS updates.
- Scaling: break Postgres/Redis into managed services or separate nodes as traffic grows.
- Backups: nightly dumps of Postgres + S3 lifecycle rules.
- Monitoring: use Prometheus/Grafana or Checkmk to track container health and DB metrics.
In summary, Outline is a streamlined, simple, and more focused open-source knowledge base alternative to Notion, designed for teams seeking to organize internal documentation and collaborate in real-time.
What You Should Know Before Installing Outline
- A domain (e.g., doc.mydomain.com) with DNS pointing to your server.
- SMTP creds for email notifications (add to .env).
- A Google Cloud project with an OAuth consent screen approved.
- An AWS S3 bucket with private ACL and bucket policy (coming up).
How To Install Outline Wiki on Docker Like a Pro
1. Prerequisites
Before you begin, make sure you have the following prerequisites in place:
- VPS, where you can host, you can use Hostinger or a Home Server.
- Docker is installed on your server. CloudFlare Tunnels are configured for your Home Server for security.
Update Ubuntu and install Docker
# Ubuntu 24.04 LTS example
sudo apt update && sudo apt install -y docker.io docker-compose certbot
sudo usermod -aG docker $USER && newgrp docker
2. Use Google as an OAuth Provider
In this guide, docs.mydomain.com will be used to represent the location you are hosting Outline; it should be replaced with the correct value.
Using Google as an OAuth provider is only supported if you are using Google Workspace.
Create OAuth 2.0 credentials in Google Cloud → APIs & Services → Credentials.
Go to https://console.cloud.google.com, create a project or use an existing one.
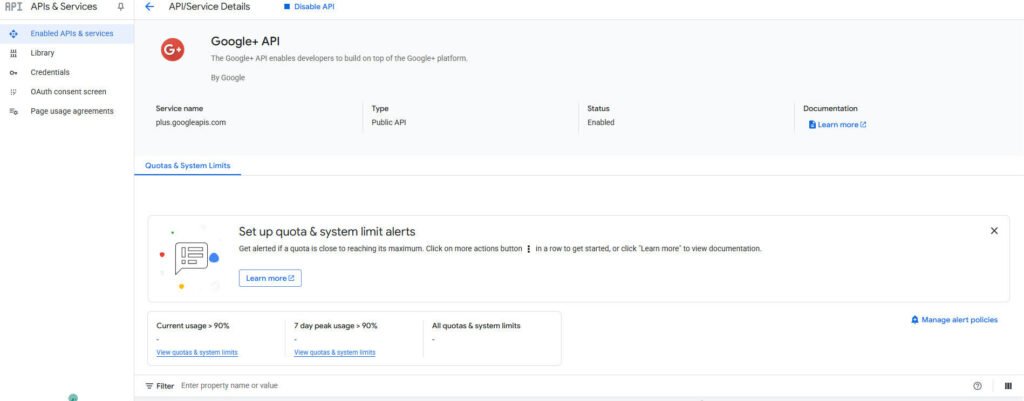
Go to APIs & Services. Click on “Enable APIs and Services”. Enable the Google+ API.
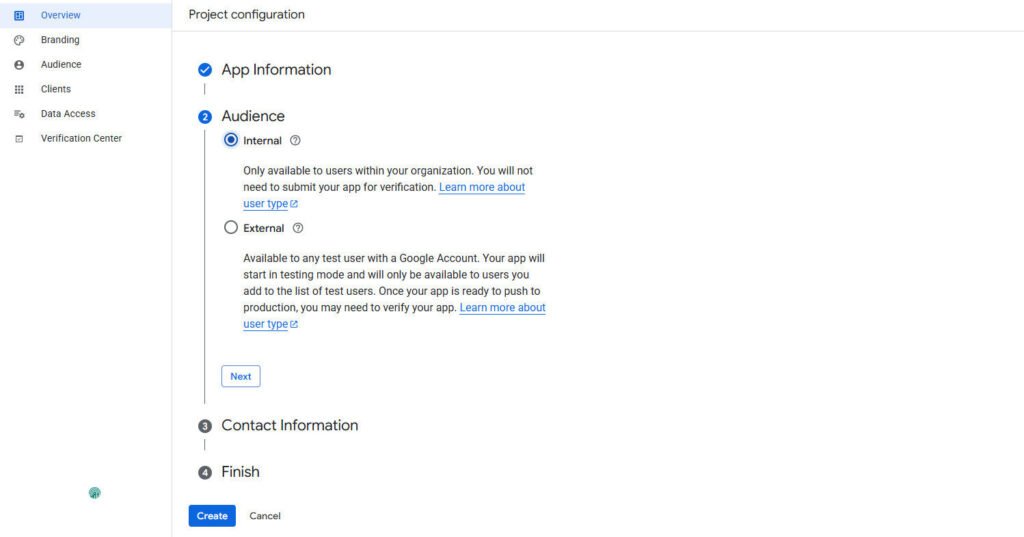
Go to the OAuth consent screen and select Internal for the user type and click “Create.” If you are not a Google Workspace user, you will not be able to select this option. Choose an “App name.” Make sure that “Authorized domains” includes the domain you are using for Outline.
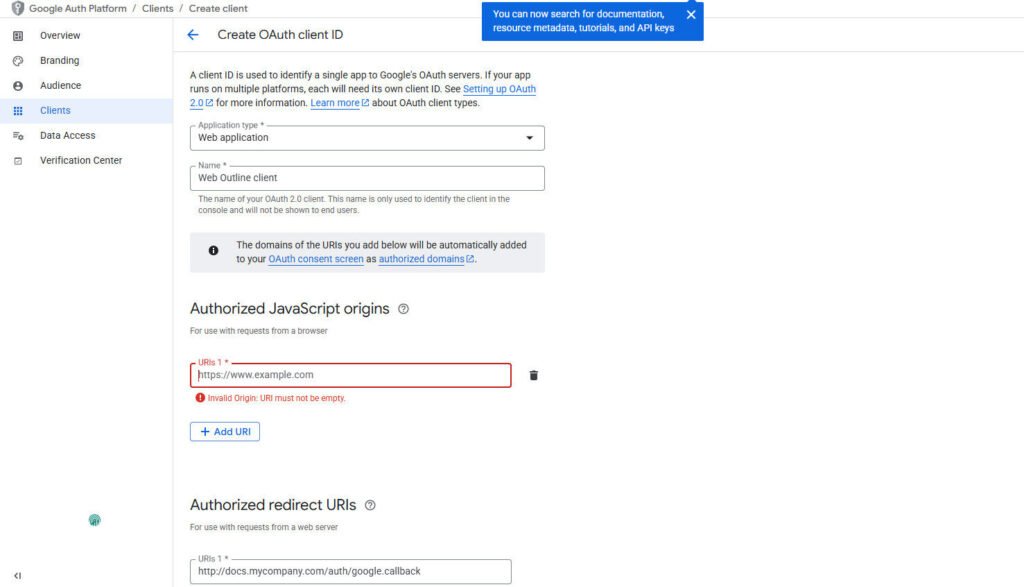
Go to Credentials, click on “Create credentials” and select “OAuth client ID”. Choose Web application as the application type. Under “Authorized JavaScript origins,” enter your domain name again. Under “Authorized redirect URIs,” enter the URL (replacing the domain name): https://doc.mydomain.com/auth/google.callback
Click “Save.” Make a note of the Client ID and Secret values. Add the values noted during the process to the following environment variables. Once you start the instance, you’ll see a new option to sign in with Google.
3. Docker Compose File
Create a docker-compose.yml file. An example configuration with all dependencies dockerized and environment variables in docker.env is as follows.
Services:
  outline:
    image: docker.getoutline.com/outlinewiki/outline:latest
    env_file: ./docker.env
    expose:
      - "3000"
    volumes:
      - storage-data:/var/lib/outline/data
    depends_on:
      - postgres
      - redis

  redis:
    image: redis
    env_file: ./docker.env
    expose:
      - "6379"
    volumes:
      - ./redis.conf:/redis.conf
    command: ["redis-server", "/redis.conf"]
    healthcheck:
      test: ["CMD", "redis-cli", "ping"]
      interval: 10s
      timeout: 30s
      retries: 3

  postgres:
    image: postgres
    env_file: ./docker.env
    expose:
      - "5432"
    volumes:
      - database-data:/var/lib/postgresql/data
    healthcheck:
      test: ["CMD", "pg_isready", "-d", "outline", "-U", "user"]
      interval: 30s
      timeout: 20s
      retries: 3
    environment:
      POSTGRES_USER: 'user'
      POSTGRES_PASSWORD: 'pass'
      POSTGRES_DB: 'outline'
volumes:
  storage-data:
  database-data:
4. Create the docker.env File
As a reference, create a docker.env file to contain the environment variables for your installation.
NODE_ENV=production
URL=https://doc.mydomain.com
PORT=3000
# Generate a hex-encoded 32-byte random key. Use `openssl rand -hex 32` in your
# terminal to generate a random value.
SECRET_KEY=generate_a_new_key
UTILS_SECRET=generate_a_new_key

# –––––––––––––  DATABASE  –––––––––––––

DATABASE_URL=postgres://user:pass@postgres:5432/outline
PGSSLMODE=disable
REDIS_URL=redis://redis:6379

# –––––––––––  FILE STORAGE  –––––––––––

# Specify what storage system to use. Possible value is one of "s3" or "local".
# For "local" images and document attachments will be saved on the local disk, for "s3" they
# will be stored in an S3-compatible network store.
FILE_STORAGE=s3
# To support uploading of images for avatars and document attachments in a distributed
# architecture, an s3-compatible storage can be configured if FILE_STORAGE=s3 above.
AWS_ACCESS_KEY_ID=get_a_key_from_aws
AWS_SECRET_ACCESS_KEY=get_the_secret_of_above_key
AWS_REGION=xx-xxxx-x
AWS_S3_ACCELERATE_URL=
AWS_S3_UPLOAD_BUCKET_URL=http://s3:4569
AWS_S3_UPLOAD_BUCKET_NAME=bucket_name_here
AWS_S3_FORCE_PATH_STYLE=true
AWS_S3_ACL=private
# ––––––––––  AUTHENTICATION  ––––––––––
GOOGLE_CLIENT_ID=
GOOGLE_CLIENT_SECRET=
# ––––––––––––––  EMAIL  –––––––––––––––
SMTP_HOST=smtp.mailgun.org
SMTP_PORT=465
SMTP_USERNAME=username@mydomain.com
SMTP_PASSWORD=<password>
SMTP_FROM_EMAIL=username@mydomain.com
5. Use AWS S3 as the File Storage
Create an S3 bucket (outline-uploads) and apply this bucket policy:
Ensure that “Block public access” (BlockPublicAcls) is set to “off” at the bucket level.
{
  "Version": "2012-10-17",
  "Statement": [
    {
      "Sid": "OutlineUploadAccess",
      "Effect": "Allow",
      "Principal": { "AWS": "arn:aws:iam::YOUR_AWS_ACCOUNT_ID:role/outline-upload-role" },
      "Action": [ "s3:PutObject", "s3:GetObject", "s3:DeleteObject" ],
      "Resource": "arn:aws:s3:::outline-uploads/*"
    }
  ]
}
6. Cross-origin resource sharing (CORS)
In your bucket’s permissions, add the following policy JSON and update AllowedOrigins to match your installation URL.
[
    {
        "AllowedHeaders": [
            "*"
        ],
        "AllowedMethods": [
            "PUT",
            "POST"
        ],
        "AllowedOrigins": [
            "https://docs.mydomain.com"
        ],
        "ExposeHeaders": []
    },
    {
        "AllowedHeaders": [],
        "AllowedMethods": [
            "GET"
        ],
        "AllowedOrigins": [
            "*"
        ],
        "ExposeHeaders": []
    }
]
The following actions must be allowed. It is recommended to create an IAM user with only this policy attached, then generate an access key and secret for the user to be included in the environment variables.
{
    "Version": "2012-10-17",
    "Statement": [
        {
            "Sid": "VisualEditor",
            "Effect": "Allow",
            "Action": [
                "s3:GetObjectAcl",
                "s3:DeleteObject",
                "s3:PutObject",
                "s3:GetObject",
                "s3:PutObjectAcl"
            ],
            "Resource": "arn:aws:s3:::my-bucket-name/*"
        }
    ]
}
Ensure the IAM role or user tied to your AWS_ACCESS_KEY_ID has s3:PutObject on the bucket. Without it, image uploads will fail.
7. Deploy Outline
docker compose pull
docker compose up -d
8. Configure Nginx Proxy Manager (for URL & Port)
- Log in to Nginx Proxy Manager → Hosts → Proxy Hosts → Add Proxy Host
- Domain Names: doc.mydomain.com
- Scheme: http • Forward Hostname/IP: outline • Forward Port: 3000
- Toggle Websockets Support and click Save.
- Edit host → SSL tab → request a Let’s Encrypt cert, force HTTPS. Done!
Conclusions
Outline documentation can be intimidating for newcomers to Docker and Linux. This tutorial simplifies the process with Docker Compose, authentication with Google OAuth, AWS S3 storage, and Nginx Proxy Manager in place. You can now install Outline Wiki on Docker the professional way—secure, scalable, production-ready, and 100% under your control.
Enjoy the knowledge-sharing bliss!